


Arts & Crafts, Craft ideas, Play Ideas
Flower pressing with children
Dec
Flower pressing is a wonderful traditional craft or hobby to do with children of all ages! Get creative and closer to nature at the same time with this lovely, calming pastime with so many possibilities!
It is a great way for children to study and appreciate flowers more closely. It is perfect for botany lessons in Montessori homeschooling or Waldorf / Steiner education. It is always exciting to see how your pressed flowers turn out and there are so many beautiful crafts to be made with them. Here are some tips for successful flower pressing and a few of our favourite ideas for pressed flower crafts.
What flowers should we use for flower pressing?
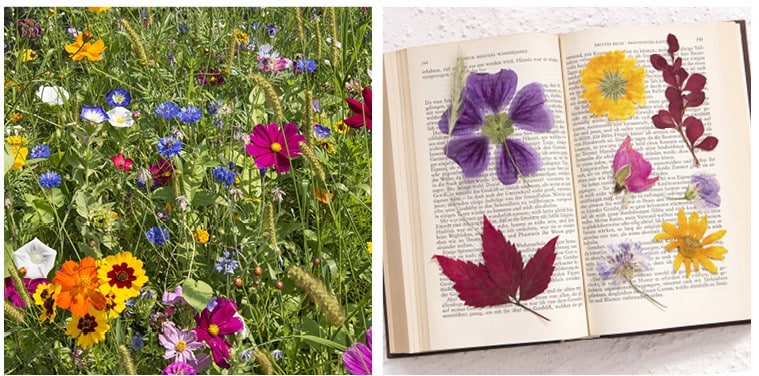
Experimenting with different flowers and seeing how they turn out is all part of the fun! Flowers from your own garden are ideal. Naturally flat blooms and flowers with just a single layer of petals work best. Pansies and violets are perfect for pressing. Lavender works well too. It is a lovely way to preserve flowers from a special bouquet or occasion too!
Should you pick wild flowers for pressing?
There is good advice on The Natural History Museum website. They recommend following the “one in twenty rule”, so if there are twenty plants, it is okay to take from one of them, as long as it’s not a species protected by legislation.
Check the legislation for your area and pick responsibly, always being sensitive to nature. There will be plenty of unprotected flowers that are growing abundantly in the park or on a walk.
Daisies, buttercups and forget-me-nots are perfect for collecting and pressing in the UK. The glorious Swiss landscape is full of wildflowers, again just check the legislation and pick only the unprotected, abundant ones.
Ferns and leaves look wonderful when pressed too. A small number can be carefully picked off or collected from the ground without harming the plant or tree.
Tips on flower pressing with children
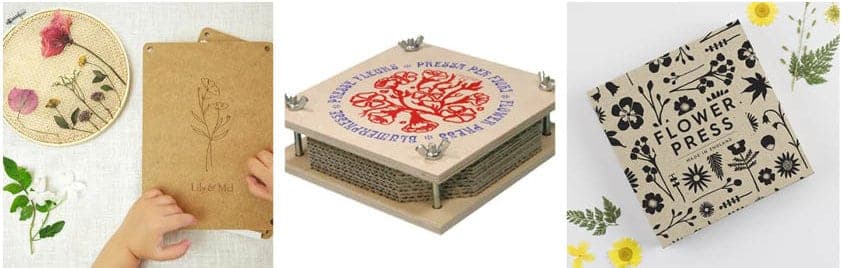
A child-friendly flower press – such as the fabulous Lily & Mel, Glückskäfer and Studio Wald ones – makes pressing flowers easy and provides everything you need to get started.
Otherwise, you can place flowers between two sheets of parchment paper and put inside a heavy book, with more heavy books on top to press them down.
The best time to pick flowers for pressing is in the morning after the dew has dried. You don’t want your flowers to be wet or they could go moldy.
Press your flowers as soon as possible after picking, to avoid drooping or wilting.
Cut off any obvious stamen to avoid staining the petals of your flower.
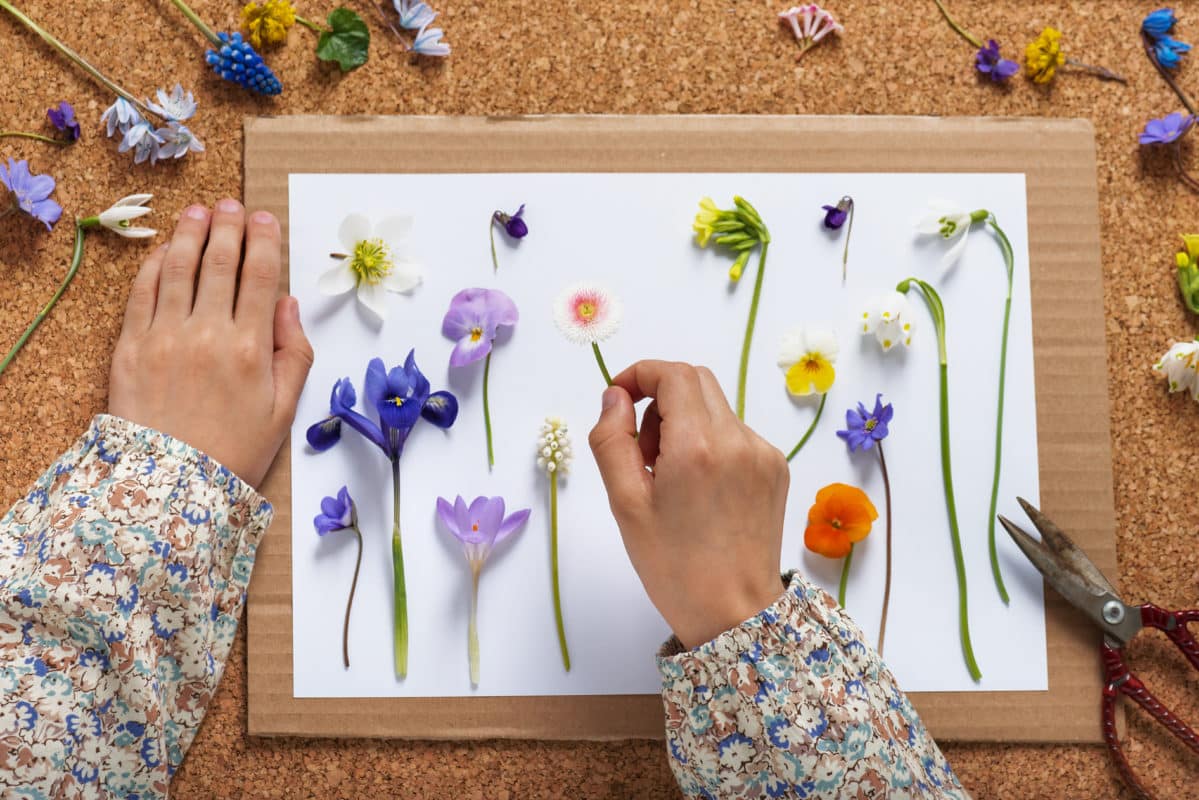
Help your child to gently press the flowers down on to paper with their fingers. Placing the flowers face down can help avoid squashing the petals.
How long do the flowers take to dry?
Depending on the flower, they can take a few days to a few weeks to dry. They are ready once they no longer feel damp at all. Be patient as the flowers need to be completely dry to be preserved. Most flowers take 2-4 weeks to dry.
Choose a dry, warm place to dry your flowers if possible. Faster drying times can help to preserve the vivid colours better. Be sure to handle them carefully as dried flowers can be brittle.
Now what should we make?
There are so many wonderful and fun crafts your children can make with pressed flowers! Flower pressing is the perfect creative craft activity for appreciating the beauty of nature with children!
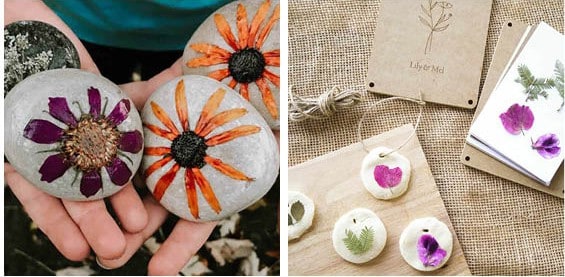
Flower pebbles
We love this creative idea from Little Pine Learners – use your pressed flowers to make decorative pebbles and give them as paperweights or use them to decorate your garden or table! So simple but so beautiful, this is a real favourite of ours!
Decorate cards & paper crafts
Pressed flowers are wonderful for adding to greeting cards and paper crafts! Add pressed flowers to handmade cards, stationery, bookmarks or giftwrap. They will make delightfully personal and thoughtful gifts for family and friends! The pressed flower art kit from Lily & Mel is a lovely plastic-free DIY craft kit with everything you need to create sustainable pressed flower art.
You can even add pressed flowers to your own paper-making with the Lily & Mel recycled paper making kit . Teach children about recycling and sustainability while having lots of creative fun!
Decorate a hiking stick or wand with pressed flowers
Flower pressing is the perfect craft for getting outdoors and appreciating nature!

Add pressed flowers for a magical hiking stick or wand! A wonderful idea from Little Pine Learners for making nature walks and outdoor nature play even more fun and magical! Children will love decorating sticks with pressed flowers to take on their next outdoor adventure.
Create wall art
Decorate your walls with homemade art made with your children’s favourite flowers or special flowers that hold memories of fun family nature walks or special occasions.
Arrange the pressed flowers into a collage on paper and frame it – we love this example from Shannon Kirsten Studio.
Or use the lovely jute and bamboo frame in the pressed flower art kit from Lily and Mel to display your pressed flowers beautifully and make a gorgeous sustainable piece of art.

Flower pressing is such a lovely pastime for a slower, natural childhood or at any age! I hope you have lots of fun with it, we would love to see your creations!